1/2/17

AR-15 Small Grip Comparison: BCM Gunfighter Grip MOD 0 vs. Magpul MOE K

I had originally bought the BCM Gunfighter Grip MOD 0 for my AR-15 build because I thought that it included features that I needed, namely the duckbill option. After a preliminary fitting of all my parts, it turns out that most modern enlarged trigger guards eliminate the gap between the trigger guard ears that digs into your middle finger, so a duckbill on a grip wasn't needed in my application. Once I made that realization, I immediately wanted to try a Magpul MOE K grip because of its smaller size and lighter weight. 

Lucky for me, I found one locally that I was able to try, and this is what I found when I compared the two grips head to head.


Before we go any further, I want to reiterate how small my hands are. I've taken some photos of my hands against a ruler and tape to try and quantify my hand size, and by doing so, give you a reference to why I might like one grip over the other, and to give you the chance to compare your hand size against mine at home.

My hand measures about 3.5" wide across the knuckles when open, and about 4" wide when in a fist. 

Circumference across the knuckles is about 8.5" when the tape is pulled taut. 

From the base of my palm to the tip of my middle finger is about 6.75" in length.

This AR-15 build that I'm in the process of completing is geared towards being as practical as possible. To me, this means cutting weight where I don't need it, and putting it on where it makes sense. As such, I decided to weigh these grips to see how much of a weight difference there is between them.

 BCM Gunfighter Grip MOD 0 coming in at 3.2oz including mounting hardware

Magpul MOE K grip coming in at 2.4oz including mounting hardware

As we can see from the photos above, the Magpul MOE K grip is the lighter grip of the two, being approximately 0.8oz lighter than the BCM Gunfighter Grip MOD 0. Is a weight difference that is under an ounce going to make a huge impact on this build? Most likely not, but if I like the lighter grip and can save the weight, why not?

With the BCM Gunfighter installed, the grip is perfectly usable. My hand naturally rides high into the grip thanks to the shape of the backstrap, but the extra circumference makes the grip down at my pinky a little wide for my liking. I also have quite a bit of room at the bottom of the grip that I don't need. I know for a fact that the trap door that the BCM grip has is contributing to its heavier weight. I don't plan on using the trap door, so this feature is not something that is going to affect my decision.

Holding the BCM Gunfighter Mod 0 grip in a natural firing position

With the Magpul MOE K grip installed, I could immediately feel the difference in circumference. My grip felt overall more secure, and my pinky in particular felt like it had a better hold on the MOE K. The overall grip length is also much closer to my hand size than the BCM. I don't feel cramped on this grip, and I don't feel the bottom corner of the grip on my palm. That being said, I can completely understand if someone with larger hands found the MOE K to be uncomfortable from its small circumference and short length.

Holding the Magpul MOE K grip in a natural firing position. Notice how my pinky gets around the grip more than the BCM. Very nice!

After handling these grips side by side, it was immediately apparent to me that the Magpul MOE K grip felt better to me than the BCM Gunfighter MOD 0 grip. Even so, I cannot say that either grip is made to a higher quality or standard, as both are excellent products.

If you are making a build for children, petite women, or someone like me who was just born with the smallest hands on planet Earth, than I would highly recommend the Magpul MOE K grip. The lower price and the lighter weight are also an added bonus.

If you like the option for a duckbill, trap door, and have small hands that aren't as small as mine, than I would absolutely recommend the BCM Gunfighter MOD 0 grip. The duckbill is particularly useful if you're using a standard MilSpec trigger guard or any other trigger guard that leaves a gap between the ears of the lower receiver.

All in all, I'll be returning the BCM Gunfighter and will be picking up a Magpul MOE K for myself very soon. It's too bad that I have to return this loaner Magpul grip, I like it so much that I don't want to take it off and give it back!

'Till next time.


-AA

12/31/16

The AR-15 Build: buffer tube and stock

December 21, 2016 was when Brownell's put our a pretty good promo code that I decided to take advantage of. The offer was $10 off $75 plus free standard shipping! That's over a 10% discount if you spend under $100, which I absolutely did.

I decided to buy the stock and buffer tube so that I can try out the BCM Gunfighter Grip that I have and see if I might want to try a MAGPUL MOE K grip instead. Even without a barrel or handguard, being able to shoulder the lower properly will be a huge help in my eventual grip decision.


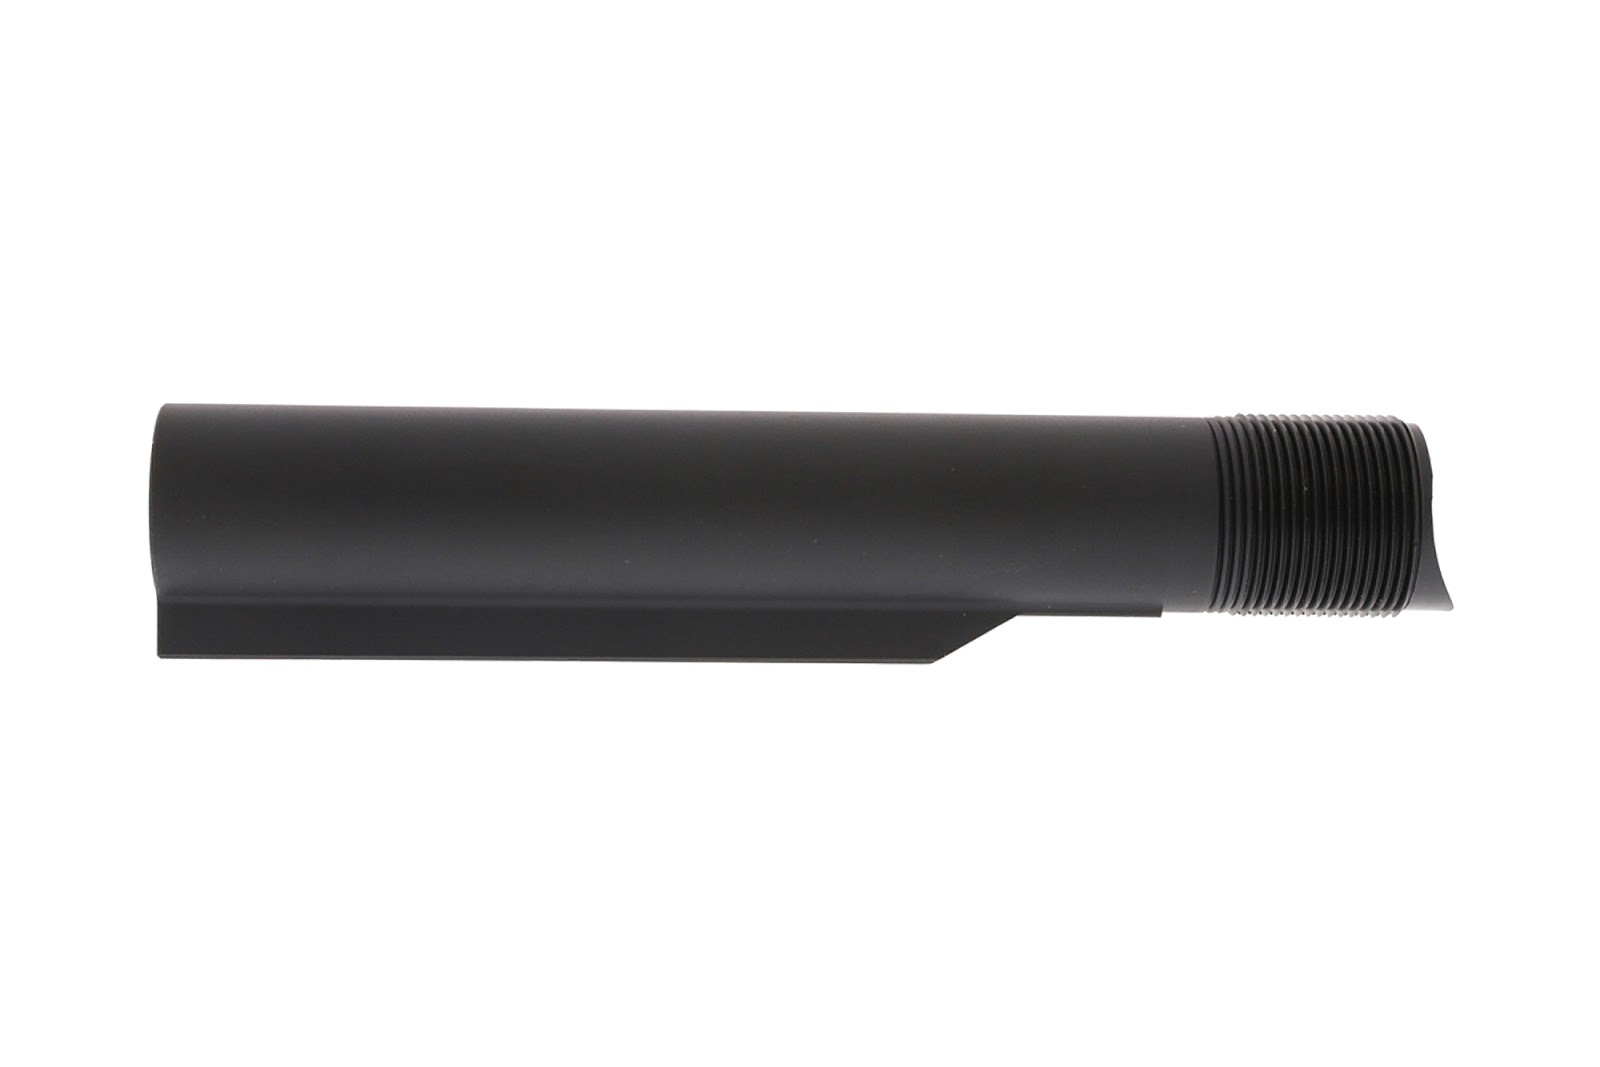
POF Anti-Tilt Buffer Tube - MilSpec
Eventually, I envision this build to utilize a piston gas system. As such, carrier tilt can be a common issue for piston run AR-15's. The answer is an anti-tilt buffer tube! If you aren't familiar with buffer tubes, a standard buffer tube is cut flush at the threads. This provides no additional support to the carrier as it reciprocates in the firearm.

The bottom of the threaded area is flush with the rest of the buffer tube


An anti-tilt buffer tube has an elongated bottom area that always supports the bottom of the carrier. As soon as the carrier begins its rearward movement, it is already being supported by the buffer tube, so there is less carrier tilt and less wear to the internal components.

The bottom of the threaded area has the additional lip that supports the carrier even when fully forward


This also happened to be the best price that I could find on Brownell's for an anti-tilt buffer tube, and the added discount was a big plus as well.


Mission First Tactical Battlelink Minimalist Stock
As far as I can tell, this is the lightest collapsible stock on the market. It is also very decently priced at around $50 retail. Brownell's already had it for less, and the added discount along with it's incredibly light weight design made this purchase a no brainer.


That makes two more major components bought for the build! My parts list is now looking something like this:


    Total cost to date: $387.44
    Estimated cost remaining: $1,602.45

    Estimated Grand Total: $1989.89


    Soon I'll see if I can find someone who can loan me a MOE K grip here locally so I can compare it to my Gunfighter Grip.


    'Till next time.


    -AA

    12/27/16

    AR-DIY: Painting Magazines

    With the lower receiver that I have, being the Texas Special Edition, the cutout star in the magazine well presents an interesting opportunity for me to play around with painted magazines. The idea is to paint the magazine only at the top so that the color will be visible through the star. While the steps to paint magazines are pretty straight forward, I'll walk y'all through the way I decided to do things.

    First, the picture below shows a 20 round PMAG peaking through the star cutout. Black on black does not pop very much, if at all.


    The things you will need to paint your magazine are:

    • A magazine to paint
    • Cleaner/Degreaser (rubbing alcohol works just fine in a pinch)
    • Paint of choice (I recommend spray paint for the simplicity, and a type that specifically bonds to plastic or metal depending on the magazine you're painting)
    • Painters tape
    • Disposable gloves (optional)


    Before this step, I forgot to show the cleaning step. Just get a paper towel with some cleaner on it an rub down the area you're going to paint. Afterwards, carefully mask off any areas you don't want paint to get to while not touching the cleaned areas with your bare hands. I recommend masking off the top at the very least to keep paint out of the magazine's internals and wearing gloves.


    Using light coats, begin painting the magazine. Lots of light coats will give you a better result than a few heavy coats, as you avoid runs and uneven paint.


    After a good five or six coats, my magazine looked like this when fully dry! Next time, I'll do a better job of making sure the masking tape is fully stuck on the magazine so I get a sharp painted edge. Even so, this one still came out great.


    Here is the painted magazine inserted into the lower. Looking super cool! This is a fun and simple way to customize your magazines, and can also help with identifying which mags are yours when at the range with lots of other similar magazines everywhere.


    Next time, I'm also going to paint just the side of the magazine facing the star cutout. The magazine catch is scraping up the paint on the opposite side, and there's really no need for paint to be anywhere else besides right under the star.

    This was a fun project that only took me a few minutes to do. I absolutely would recommend anyone do this to their mags, even if only for aesthetic reasons like me. Coming up, more AR-15 parts!

    'Till next time.


    -AA

    12/19/16

    The AR-15 Upper Receiver: The build continues!

    Since receiving my beautiful Texas Special Edition lower receiver, I've been itching to get the upper to complete the base that the rest of my AR-15 will be built around.

    I am not a war fighter. I am not military or law enforcement. I do not foresee myself in a situation where I would need to slam a mechanical piston into my bolt carrier group to force it forward and seat a stubborn round (and most likely either inset the bullet in the case or cause an even worse jam). As such, I decided that I wanted to go with an upper with no forward assist to save some weight and reduce the cost in parts by a small amount. Luckily enough, Aero Precision makes just the upper! It has provisions for a dust cover, includes a shell deflector, but has omitted the forward assist.

    Shell deflector, provisions for a dust cover, but no forward assist!

    Now here is where things get interesting. I originally saw the upper for sale at Brownell's, but what stood out to me the most was that there was an American flag laser engraved onto the upper, just above the charging handle area. I'm quite happy to be an American, but I wondered if there was an upper without the laser engraving that was cheaper to buy. Sure enough, after spending much time and effort behind Google, I found some being sold between $65 and $70. After assessing about three different online retailers on their tax and shipping costs, I was stunned to find that the cheapest upper would not be a stripped upper, but one that comes with a standard milspec dust cover already installed. Granite Ridge Outfitters had their upper on sale for $69.95 with free shipping and no tax cost to me. Other retailers has uppers without dust covers selling for $65 flat, but their shipping costs brought their total cost to around $75.

    Packaging looks familiar..! 

    The lower with no forward assist!

    Now that I have an upper with a dust cover, this presents an interesting opportunity for me. When I buy the replacement cover, I will measure the weight of both of them to see how much heaver the standard dust cover is. Granite Ridge also threw in these three stickers that are very cool, thanks!

    As my build stands now..


    Brownells


      Total cost to date: $305.23
      Estimated cost remaining: $1,688.69

      Estimated Grand Total: $1993.92

      So now I'm back under my $2000 budget, and I have a beautifully matched set of Aero Precision receivers to base the rest of my build on. Hopefully I can grab a few more parts this winter season that will start making my random pile of pieces look more like an actual rifle.


      'Till next time.

      -AA

      The AR-15 Lower Receiver: God Bless Texas!

      I first laid eyes on the lower receiver of my dreams when I was doing random Google searches for Texas related AR-15 lowers. There are lots of different companies in Texas making lowers, and lots of lowers with Texas related markings or engravings, but nothing was really my style. All either too plain, too expensive, or too gaudy.

      It was at this point that I stumbled upon the Aero Precision Special Texas Edition lower receiver. It was absolutely perfect. The outline of Texas is engraved on the right hand side, and a star is cut all the way through the mag well in the middle of the state. It's just the right amount of flair that makes me really excited, and it's design is so simple that I find it hard to believe that no one else is making a lower like this.


      After looking around for people selling this lower, my heart completely broke. Since this lower is a special edition, they are hard to come by, and the people that do have them are charging a large premium over the standard Aero Precision lowers. As such, I prepared myself to never find one for a good price.

      That's when my prayers were answered; Primary Arms was selling the Texas Edition lowers, and they were only $99.99! I immediately jumped on the chance and bought one. After taxes, shipping, and a $25 FFL fee, the grand total for the lower came out to $139.76.

       Your standard Aero Precision cardboard box

      Your not so standard Texas Special Edition lower receiver!

      The enabler in me reasons that this lower was absolutely worth the extra cost due to the weight savings of the cutout star. The realist in me knows that I bought this purely because of its cool factor.

      If you want save money on a forged upper and lower, I wholeheartedly recommend that you look into the Anderson Arms offerings. I am buying an Aero Precision upper to go along with this particular lower just so that I have matching manufacturers making both the upper and lower receivers. I hear that matching manufacturers for the upper and lower is generally a good practice to follow, and for my first build, I don't see why I wouldn't want to take this advice.

      Now that this exquisite lower is in my possession, my parts list is as follows:


      Total cost to date: $235.28
      Estimated cost remaining: $1,777.99

      Estimated Grand Total: $2013.27

      As you can see, I've gone over my estimated budget by just a bit with this lower. I might swap out the BCM grip for the cheaper and lighter MAGPUL MOE K grip, but I'll have to play around with the BCM grip a bit before making any final decisions. I will also continue to hunt for better prices from different retailers, so I'm confident that I can stay under my $2000 budget.

      Be on the look out for Christmas/New Years purchases as well, I'm feeling motivated now that I have a lower!


      'Till next time.

      -AA